

Top Drone Camera Gimbal DIY Kits for Global Buyers

Choosing a suitable kit for Drone Camera Gimbal Diy requires more than comparing prices. Global buyers need stable footage, compatible electronics, clear instructions, and dependable replacement parts. A lightweight gimbal may look attractive online, yet its motors can struggle with a heavier mirrorless camera. That small mismatch can create vibration, tilted horizons, and disappointing footage.

Chris Anderson, former CEO of 3D Robotics and a recognized drone industry leader, once described drones as “the next platform.” His words remain relevant because a gimbal transforms that platform into a practical imaging system. The best DIY kits combine brushless motors, an inertial measurement unit, adjustable camera plates, and responsive control boards. They should also support careful balancing before the first flight. Even a few millimeters of imbalance can increase motor heat and reduce battery life.

This guide compares leading gimbal kits for buyers across different regions. It considers camera payload, stabilization performance, assembly difficulty, firmware access, shipping support, and long-term serviceability. Some kits promise professional results, but their manuals may be thin. Others offer excellent hardware with confusing software. No kit is perfect. Builders may need to print a spacer, replace a cable, or tune the controller twice. That is part of the learning process, not necessarily a product failure. Always check local drone, radio-frequency, privacy, and flight-safety requirements before testing. A careful bench test, a secured propeller setup, and realistic payload expectations can prevent expensive mistakes. This comparison aims to make the decision clearer, while recognizing that every camera, aircraft frame, and operating environment behaves differently.
Top Drone Camera Gimbal DIY Kits for Global Buyers

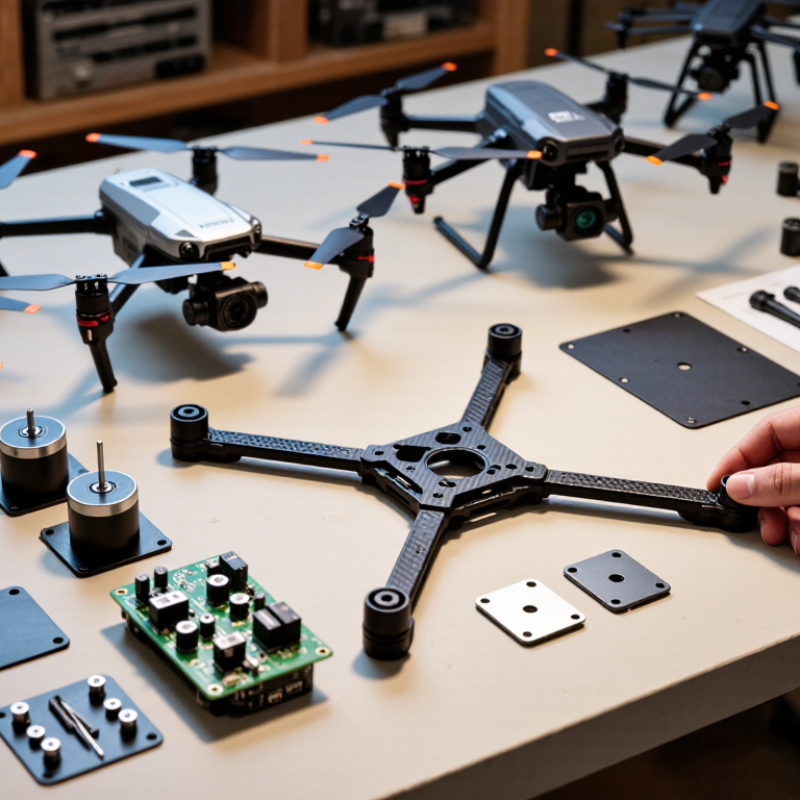
What a DIY Drone Camera Gimbal Kit Includes

A DIY drone camera gimbal kit usually includes a two- or three-axis frame, brushless motors, an IMU sensor, and a stabilization controller.

It should also contain vibration dampers, mounting plates, screws, wiring, and a camera interface cable. Some kits include a balancing tool, but many do not. That omission matters.

The controller reads angular movement from the IMU and adjusts motor output several hundred times per second.

Look for adjustable PID settings, protected connectors, and clear voltage requirements. A balanced camera should stay level when power is removed. Small details matter.

The frame should fit your camera’s weight and mounting pattern, not only its advertised dimensions.

My first assembly looked clean, but the lens shifted during braking because the dampers were too soft.

Market data supports stronger demand for practical aerial imaging equipment.

MarketsandMarkets projected the commercial drone market to grow from 30.6 billion dollars in 2023 to 54.6 billion dollars by 2028. The Federal Aviation Administration reported 855,860 registered drones in the United States by December 2023.

These figures do not guarantee every kit will perform well. Buyers should verify payload limits, replacement-part access, radio compatibility, and local operating rules.

A useful kit includes documentation with wiring diagrams and calibration steps. Without those, even good hardware becomes guesswork.

Calibration is easy to underestimate.
How to Match a Gimbal Kit With Your Drone and Camera

Choosing a DIY drone camera gimbal kit starts with the aircraft, not the camera. Check the drone’s payload rating, mounting holes, battery output, and available space. A compact drone may lift a small action camera, but it can struggle with a heavier mirrorless camera. Leave a safety margin of at least 20 percent. More capacity improves flight stability.

Match the gimbal’s payload range to the camera, lens, filter, and memory card together. Measure the complete setup before ordering. The camera should sit near the gimbal’s rotation axis, not hang far forward. During my own test fitting, a few millimeters of imbalance caused visible horizon drift. It looked minor on the workbench. It was not minor in the air.

Check the control connection and voltage requirements carefully. Some kits need a separate controller or regulated power supply. Others support basic tilt control through the drone’s existing system. Confirm connector types, firmware access, and calibration steps. Small vibration dampers can reduce rolling-shutter distortion, but soft dampers may create slow wobbling. This is where practical judgment matters. Test hover footage in calm conditions before carrying expensive equipment. Keep spare screws and a simple balance tool nearby. I once trusted the printed weight range too much, and the final camera cage pushed the setup beyond comfortable handling. A second measurement would have prevented that mistake.

Top Drone Camera Gimbal DIY Kits for Global Buyers - How to Match a Gimbal Kit With Your Drone and Camera
DIY Gimbal Kit Profile Stabilization Axes Typical Payload Range Recommended Camera Class Typical Camera Weight Typical Kit Weight Input Voltage Mounting Pattern Control Method Drone Size Guidance Best-Match Applications
Micro 2-Axis Brushless Kit Pitch and roll Up to 250 g Small action camera or compact FPV camera 60–180 g 90–180 g 7.4–12 V DC Approx. 20–30 mm center spacing PWM or serial control; basic flight-controller stabilization Small multirotor with at least 300 g useful payload FPV recording, recreational flight, lightweight inspection
Compact 3-Axis Brushless Kit Pitch, roll and yaw Up to 500 g Action camera or small fixed-lens camera 80–300 g 180–350 g 7.4–14.8 V DC Approx. 25–40 mm center spacing PWM, UART or CAN, depending on the controller Medium multirotor with at least 600 g useful payload Travel video, mapping previews, general aerial photography
Mirrorless 3-Axis DIY Kit Pitch, roll and yaw Up to 1.2 kg Compact mirrorless camera with small lens 350–850 g 450–800 g 11.1–16.8 V DC Approx. 35–55 mm center spacing Serial bus, PWM and optional remote camera trigger Heavy-lift multirotor with at least 1.5 kg useful payload Commercial photography, real-estate imaging, controlled surveys
Long-Lens Mirrorless Kit 3-axis stabilization with adjustable counterweights Up to 1.8 kg Mirrorless camera with a moderate zoom lens 600–1,300 g 700–1,200 g 11.1–22.2 V DC Adjustable rail or plate mounting Serial bus, PWM and camera-control interface Heavy-lift drone with at least 2.2 kg useful payload Inspection, documentary work and higher-detail aerial capture
Small Cinema Camera DIY Kit 3-axis stabilization with high-torque motors Up to 3 kg Small cinema or box-style video camera 1.0–2.4 kg 1.1–2.0 kg 14.8–25.2 V DC Adjustable dovetail plate or 15 mm rail support Serial bus, PWM and optional follow-focus or shutter control Professional heavy-lift drone with at least 3.5 kg useful payload Film production, broadcast work and long-duration video capture
Thermal or Multisensor Payload Kit 2-axis or 3-axis, selected according to sensor housing Up to 1.5 kg Thermal, multispectral or dual-sensor module 250–1,000 g 350–900 g 9–24 V DC Custom plate, threaded inserts or manufacturer-specific adapter Serial bus, CAN or dedicated payload interface Medium or heavy-lift drone with at least 2 kg useful payload Infrastructure inspection, agriculture and search operations

Selection guidance: verify the camera’s total ready-to-fly weight, center of gravity, lens length, mounting thread, power requirement and control protocol before purchase. The payload range should include the camera, lens, battery, memory card, filter, mounting plate and any cable or adapter. A practical drone payload margin is at least 20–30% above the complete gimbal-and-camera assembly.

Step-by-Step Gimbal Assembly and Installation

A stable camera gimbal begins with careful assembly, not expensive hardware. The FAA’s 2024 Aerospace Forecast reports more than 1.8 million registered drones in the United States, increasing demand for reliable aerial imaging. For global buyers, a modular DIY kit can simplify repairs and reduce shipping delays.

Work on a clean, grounded surface. Check the frame, motors, vibration dampers, wiring, and mounting screws before assembly.

Install the dampers evenly, then attach the camera plate without forcing the threads. Leave cables slightly loose. Tight cables can transfer vibration into the lens.

Small mistake. Big effect.

Connect the power leads with the correct polarity, and secure every connector against movement. The European Union Aviation Safety Agency emphasizes operational safety and equipment reliability in its drone guidance.

After powering the controller, balance the camera manually before calibration. The lens should remain level when the frame tilts gently.

Use a low-power bench test first, with propellers removed. Then inspect the live image for rolling lines, delayed correction, or motor heat.

A 2024 Drone Industry Insights market report identifies imaging as a major commercial drone application, but field performance still depends on installation quality.

My own practical lesson is simple: tightening everything harder does not improve stability. It can damage threads, compress dampers, and create new vibration paths.

Record the wiring layout and calibration values before outdoor testing. Recheck them after transport.

How to Calibrate, Stabilize, and Test the Gimbal

A reliable DIY drone gimbal begins with mechanical balance, not software. A 2024 Drone Industry Insights report values the global drone market at over USD 50 billion by 2030. More builders now need repeatable camera stabilization.

Place the aircraft on a firm, level bench. Remove the propellers before powering the system. Balance the camera until each axis stays still without motor assistance. Then calibrate the IMU with the frame completely motionless. Check the horizon from three angles. A small tilt can become obvious in aerial footage. Set gentle PID values first, then increase stiffness gradually. I once used excessive gain. The gimbal vibrated like a small electric toothbrush.

Testing should imitate real flight conditions. Record ten seconds while the frame is stationary. Next, rotate the aircraft slowly through each axis. Watch for drift, delayed recovery, and motor heat. A practical target is less than one degree of visible horizon movement during slow rotation. That target is not universal. Heavy lenses and flexible mounts need different limits.

Grand View Research projects strong commercial drone growth through 2030, increasing demand for dependable imaging systems. That growth also raises quality expectations. Use a short flight test after bench calibration. Review the footage frame by frame. Note wind, battery level, payload weight, and temperature. My own early tests ignored temperature changes. That mistake made the morning calibration unreliable by afternoon. Keep a calibration log, even when the result looks perfect.

Global Buying Factors: Compatibility, Shipping, and Support

Top Drone Camera Gimbal DIY Kits for Global Buyers

Global Buying Factors: Compatibility, Shipping, and Support

A reliable DIY gimbal kit must match your drone’s payload, mounting holes, voltage, and camera dimensions. Check these details before comparing prices. Measure twice. A camera may fit physically but exceed the gimbal’s balance range. That mistake can cause vibration, overheated motors, or unstable footage. Inspect connector types and control protocols as well. Some kits require separate cables, firmware tools, or a compatible flight controller. Product drawings are more useful than attractive photographs.

Shipping creates different risks for international buyers. Request the packed dimensions, gross weight, and a clear parts list before payment. This helps estimate freight charges and prevents missing components. Ask whether delicate arms receive foam protection. A crushed corner can bend a calibration bracket. Customs paperwork should describe the kit accurately and include ordinary technical specifications. Avoid sellers who provide vague invoices. Delivery estimates also need caution. I have seen a parcel arrive quickly, while a small replacement cable took several weeks.

Support quality often decides whether a kit becomes a working camera system. Look for setup instructions, wiring diagrams, calibration steps, and troubleshooting videos. Confirm response times across your time zone. Ask about spare motors, dampers, screws, and replacement boards. That matters. A low-cost kit is not economical if one small part stops the build. My own testing has shown that manuals can omit grounding details or software versions. I now request those details before ordering, though I still occasionally miss an important compatibility note.

×
img

    Contact Info

    Phone number

    661-392-8948

    Address info

    3451 Pegasus Drive, Bakersfield, CA USA